Saturday, August 18, 2012

August 16: Admiring the Timber Frame

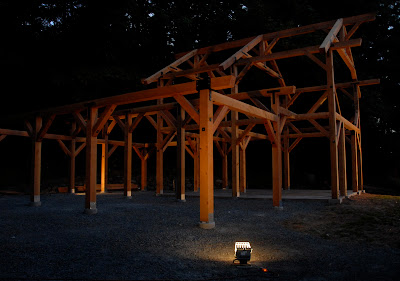
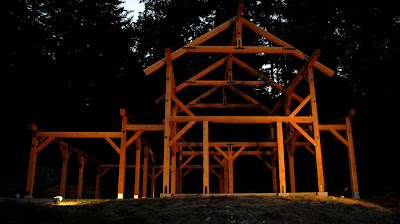
 First, in the evening...


timber frame barn orcas island

timber frame barn orcas island

timber frame barn orcas island


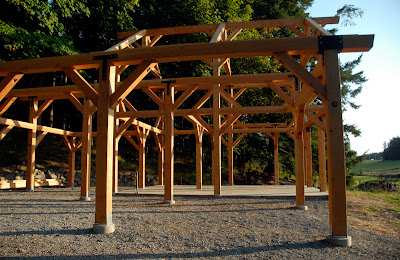
 and then in the morning...


timber frame barn orcas island


timber frame topping off barn orcas island

timber frame barn orcas island

timber frame barn orcas island


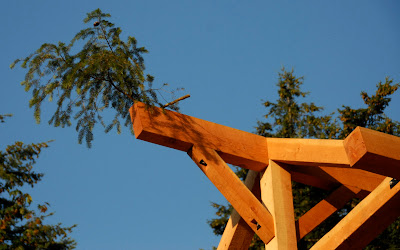
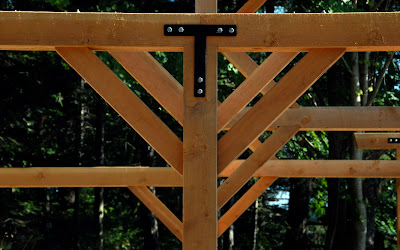
With the green branch in place, it was time to stand back and admire the beautiful timber frame structure in all its glory. Too soon it will be covered with roofing and siding...so Harry and I photographed the timbers in evening and morning light.

Wednesday, August 15, 2012

August 15: The Green Branch

Scott holds the ladder as Erik climbs up with a live Douglas fir bough


Erik and I admire the beautiful barn framing.

It's an ancient tradition to attach a green branch to the highest point of the completed timber frame. This ritual brings good luck and fortune to the structure, to the owners, and to those who have worked so hard on the project.

Tuesday, August 14, 2012

August 14: Lifting the Shed Roof Walls (Video)


The long shed roof walls were assembled on horses.
The walls are ready and waiting for the crane to arrive.
First, the crane lifts the final beam to support rafters on the south side.

Erik nudges it into place.
The crane lifts the first shed roof wall - a span of four posts, knee braces and a very long beam.
Erik hoists the connecting girt...
And holds it as Scott sets the Timberlinx connection. After this,
they used crane power to hold heavy girts in place while making connections.


Video: A beam flies into place, knee braces are fitted,
and the wall is snugged up for final connections.


The barn is designed to have generous shed roofs on three sides. This requires two massive timber frame walls to support the structure. A crane lifts the walls, which are then connected with girts. This is the last time we will need the crane as the entire timber frame structure is now in place.

Monday, August 6, 2012

August 6: Lifting the Roof Trusses


The first truss begins to rise to the top of the timber frame.
The crane holds the west truss in place while each top chord is secured and braced.
Removing the loops from the crane hook.
Securing the east truss.
Preparing to lift the center truss.
Documenting the truss lifts on video.
The crane hoists one of the ridge beams.
Tweaking a ridge beam connection.
Making final connections after the crane leaves, with Beau supervising.

During July, Erik and Scott started work on the roof trusses and the long walls designed to support the extensive shed roof. They assigned timbers to certain positions, cut them to length and routed out housings for intersections of posts, beams and knee braces. Once the three trusses were assembled, it was time for Dave to bring the crane back to lift the trusses and ridge beams. Everything went up according to plan!

Friday, July 6, 2012

July 5: Crane Day - Raising the Walls


Erik and Dave discuss each step of the crane lift.
Erik gives specific instructions for the raising the walls.
Getting all the gear ready - endless loop straps, come-alongs, bolts...
The small shed roof wall on the north side gets lifted first. That was easy.

After the shed roof wall is temporarily braced, the north wall of the barn is lifted...

...and braced in place, slightly leaning out.
The south wall pauses during the lift for come-alongs to be attached.

Once the south wall is secured, the crane lifts the girt connecting the two walls.
Walls are up, connected with the long girt on the east side, and braced.
Erik and Scott install the steel connectors tying the walls together.
The next day, Erik and Scott frame the back wall with post, beams and knee braces.

Come-alongs pull the posts together while Erik connects the knee brace.

It's so exciting to see the walls vertical! Everything went together smoothly and the crane was only here for two hours lifting the three walls and the long connecting girt on the east side. The next couple of days were spent assembling the west wall and connecting the north shed roof wall to the main structure.

Tuesday, July 3, 2012

July 3: Timber Frame Assembly

The South Bent is assembled first, and will be lifted last.
The Beam Plate will sit on top of the Posts, and are attached with steel straps.
The straps are connected with through bolts.  Drilling from both sides, to insure straight holes can be awkward.
The through bolts are tightened.
The South Bent has been assembled and lowered. 
The North Bent is assembled above the South Bent so it can be lifted first.
The bottom of the North Bent is then lowered with high lift jacks so the final, smaller wall can be assembled.

The ends of the Beam Plates, which will be exposed to weather, are sealed with an emulsified wax.


Drilling the third wall was even more awkward, with two assembled Bents underneath it.
The North shed roof wall is assembled last above the two Bents. 
This wall will be the first one to be lifted.
For the past month, Erik and Scotty have been completing the joinery on the first phase of the barn structure, the walls.  After cutting, drilling and locating housings for the posts, beams, girts and knee braces that form the walls of the barn, they are ready to be assembled.  At the end of the day today, three walls were positioned on the slab for raising on Thursday: the main north and south Bent walls, and the smaller shed roof wall on the north side. It'll be so very satisfying and exciting to see the crane lift the walls on July 5!
Monday, May 14, 2012

May 14: Timbers Arrive From the Sawmill

Rough sawn joists are unloaded at the site.

Rafters are next.

Some of Posts and Beams are unloaded, and placed on stickers

The timber package, including the post and beam material, joists, rafters, and siding was milled in February and stored at West Sound Lumber. As soon as the concrete work was completed, Erik arranged for Dave to truck the barn materials to the site.  The boomtruck provided an efficient way to unload the material.